Rye Sourdough Bread
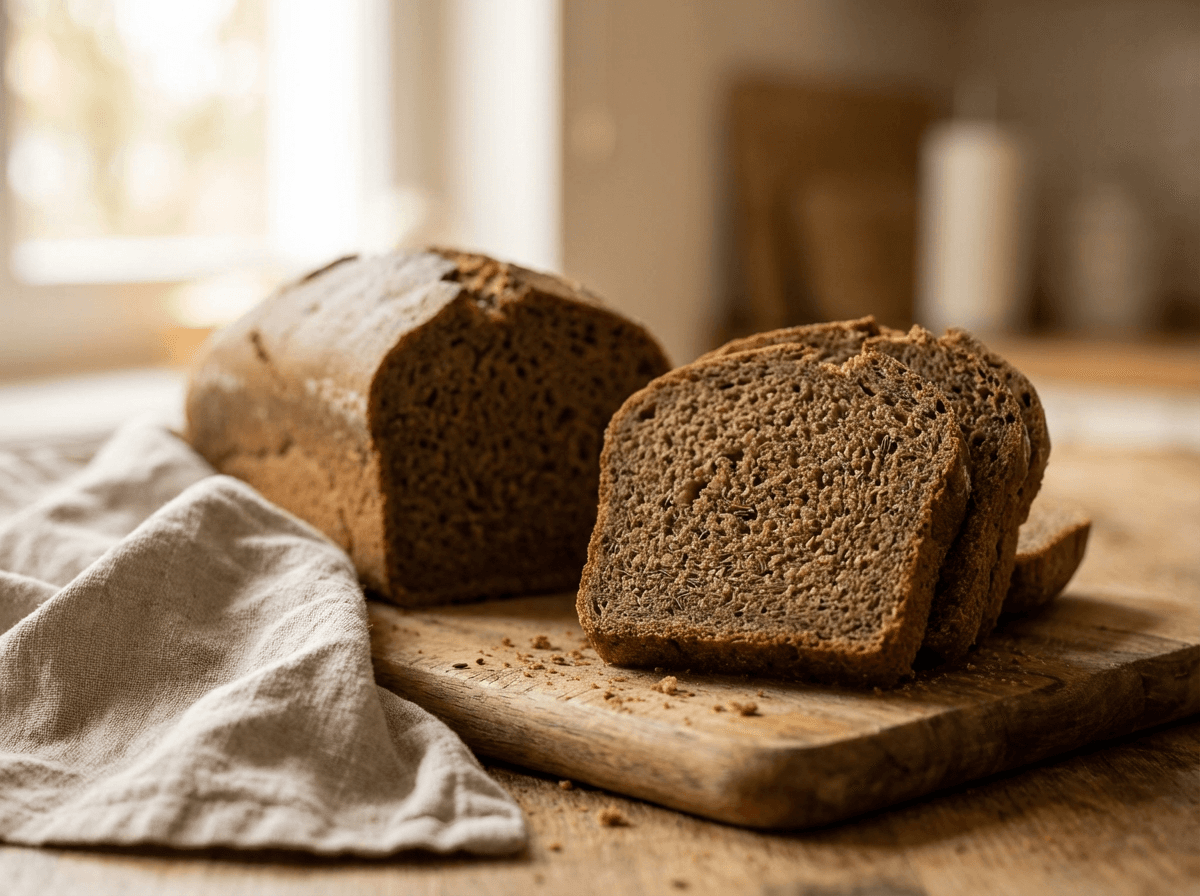
Rye bread plays by different rules than wheat. The gluten is weaker, the fermentation is faster, and the crumb is supposed to be dense. This loaf is earthy, malty, and deeply flavored -- the kind of bread that pairs with strong cheese, cured meats, and dark beer. If you're expecting a fluffy loaf, wrong recipe. If you want character, keep reading.
Ingredients
- 350gdark rye flour(70%)
- 150gbread flour(30%)
- 375gwater(75%)
- 125gactive rye sourdough starter(25%)-- maintained with rye flour, fed 4-8 hours prior
- 10gsalt(2%)
- 10gcaraway seeds-- optional, but traditional
Instructions
- 1
Combine all the flour, water, starter, salt, and caraway seeds (if using) in a large bowl. Mix thoroughly with a dough scraper or your hands. This dough won't feel like wheat dough -- it's sticky, dense, and doesn't develop a smooth, stretchy gluten network. That's normal for rye.
- 2
Mix for 3-5 minutes. You're not kneading for gluten development -- rye doesn't have much. You're just hydrating the flour and homogenizing the ingredients.
Wet your hands constantly when working with rye dough. It's aggressively sticky and will coat everything it touches.
- 3
Cover the bowl and bulk ferment at room temperature for 3-5 hours. Rye ferments much faster than wheat because of its higher enzymatic activity and weaker gluten. Watch for a 30-50% size increase and a domed top.
- 4
Generously grease a 22x12cm (9x5") loaf pan. You'll need a pan -- this dough can't hold a freestanding shape because of the low gluten content.
- 5
Wet your hands and transfer the dough to the loaf pan. Smooth the top with a wet spatula or your wet hands. Press firmly to eliminate air pockets.
- 6
Cover and proof for 1.5-3 hours at room temperature. The dough should rise to just below or level with the rim of the pan. Don't overproof -- rye dough can collapse quickly once it peaks.
Rye dough doesn't give you the same visual cues as wheat. Watch for small cracks on the surface -- that's your sign it's close to done proofing.
- 7
Preheat your oven to 230C (450F). Optionally dock the surface with a fork or skewer several times to prevent large air pockets.
- 8
Bake at 230C (450F) for 15 minutes with steam (a pan of boiling water on the bottom rack works). Then reduce to 200C (400F) and bake for another 40-50 minutes until the crust is dark brown and the internal temperature reaches 96C (205F).
- 9
Remove from the pan immediately. Let the bread cool completely on a wire rack -- this takes at least 4-6 hours. Rye bread needs this time for the crumb to set. Cutting early results in a gummy, sticky interior.
This is even more critical for rye than wheat. Many people think their rye bread is underbaked when they just cut it too soon.
- 10
Once fully cooled, slice thinly with a sharp serrated knife. Rye bread tastes even better on days 2 and 3 as the flavors meld.
Tips
Rye bread is the opposite of wheat sourdough in almost every way. Don't try to apply wheat techniques to rye. Short fermentation, no shaping, loaf pan, thin slices. Accept the dense crumb -- it's a feature, not a bug.
If you don't have a rye starter, you can convert a wheat starter by feeding it rye flour for 3-4 consecutive feedings. It'll adapt within a few days.
The caraway seeds are polarizing. If you're not sure, leave them out on your first bake and try them on the second. Toasting the seeds in a dry pan for 2 minutes before adding them to the dough deepens their flavor.
This bread lasts a week at room temperature wrapped in a towel, and up to 3 months sliced and frozen. It actually improves over the first few days.
For a milder rye, swap the ratio: use 70% bread flour and 30% rye. You'll get more rise and a lighter crumb while still tasting the rye.