How to Shape Sourdough Bread (Boule and Batard)
Shaping is where your dough becomes a loaf. It's the most physical step in the process and the one where technique matters most. Good shaping creates surface tension -- a taut outer skin that holds the dough's shape and directs oven spring upward instead of outward. Bad shaping produces flat, spreading loaves no matter how perfect your fermentation was.
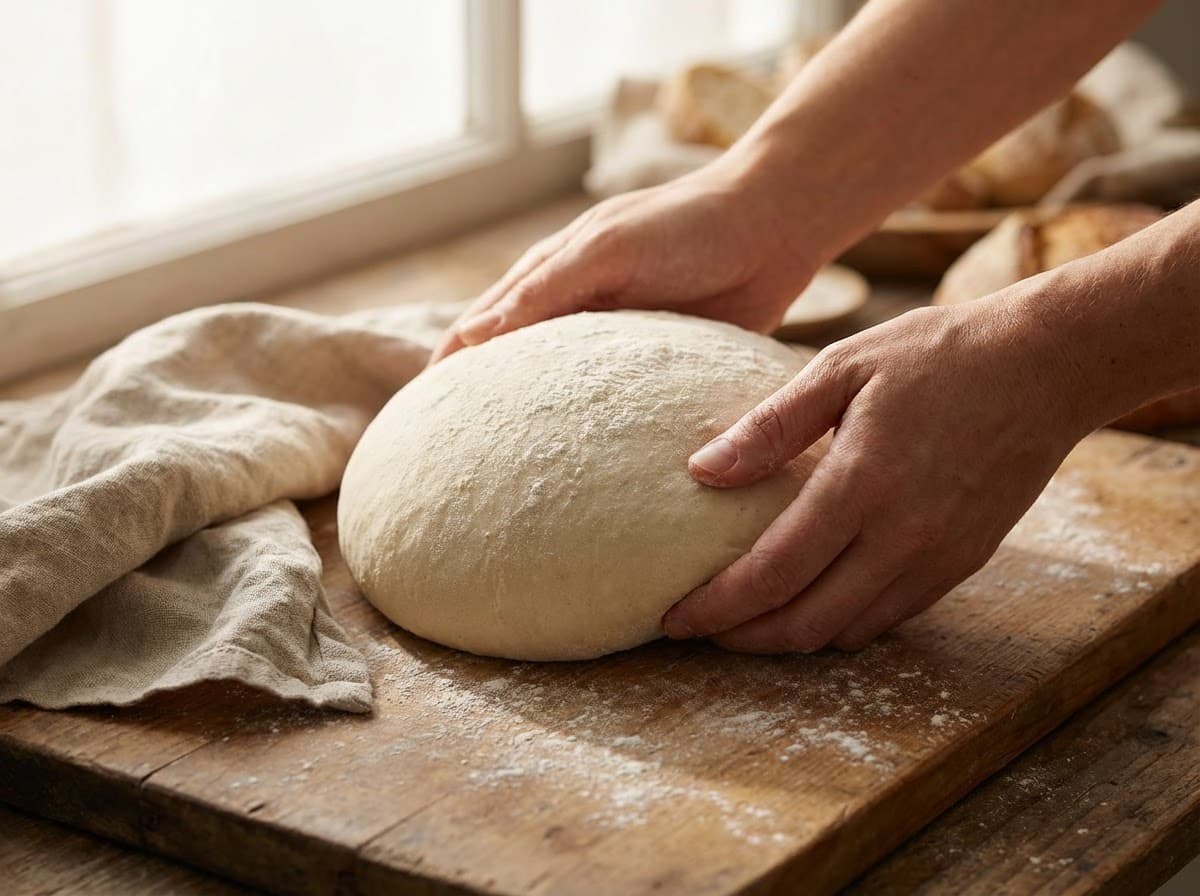
Pre-shaping: why you can't skip it
Pre-shaping is a rough rounding of the dough that happens before the final shape. If you're making multiple loaves from one batch, it's essential because you need to divide your big dough mass into portions first, and those portions will be uneven blobs.
Even for a single loaf, pre-shaping gives you a chance to build initial tension and create a more uniform dough ball. It's like a practice run for the final shape.
Here's the technique: flour your work surface lightly. Turn out your dough. Using a bench scraper or your hands, drag the dough toward you on the unfloured surface. The friction between the dough and the counter tucks the bottom under and tightens the top. Rotate slightly and drag again. Do this 3-5 times until the dough has a smooth, taut top surface.
The key is touching the dough as little as possible. Quick, deliberate movements. Imagine you're touching something scalding hot -- you'd be fast and efficient. That's the energy you want. More contact = more sticking = more problems.
The bench rest: let the dough relax
After pre-shaping, leave the dough ball on the counter uncovered for 10-15 minutes. Do not cover it with a towel. You want the surface to dry slightly -- this makes the final shaping much easier because the dough won't stick to your hands as much.
During this rest, the gluten relaxes. You just tightened it during pre-shaping, and now it's fighting back. If you try to shape immediately, the dough will spring back to its previous shape and resist every movement. After 10-15 minutes of rest, it's much more cooperative.
If you pre-shaped very tightly, extend the rest to 20-30 minutes. If the dough barely holds its shape and is spreading flat, it doesn't need much rest at all -- it's already relaxed (possibly too relaxed, which signals over-fermentation).
Here's the test: if you try to shape and the dough keeps springing back, wait longer. If the surface gets so dry it cracks when you fold it, you waited too long.
Boule shaping (round loaf)
A boule is the simplest shape and a great starting point. The technique is basically the same as pre-shaping, but more deliberate.
Flour the top of your rested dough generously. Flip it over so the floured side is on the counter and the sticky side faces up. Using both hands, fold the edges of the dough into the center, working your way around like a clock: fold the top down, the bottom up, the left in, the right in, then fill in the corners. Each fold sticks to the tacky surface, creating layers of tension.
Flip the dough over so the folds are on the bottom and the smooth, floured side is on top. Using your hands (or a bench scraper), drag the dough toward you on the unfloured counter. The friction creates tension on the surface. Rotate 90 degrees and drag again. Repeat until the surface is taut and smooth.
You'll know it's right when the dough holds a nice dome shape and doesn't immediately slump flat. If the surface tears, you've gone too far -- stop and let it rest 5-10 minutes, then try one more gentle tuck.
Batard shaping (oblong loaf)
A batard is the classic oval sourdough shape -- the one with the long score and the dramatic ear. It takes a bit more technique than a boule.
Flour the top of your rested dough. Flip it over (floured side down, sticky side up). Gently stretch it into a rough rectangle. Now fold the top third down to the middle and press gently to seal. Fold the bottom third up and over that first fold, stretching slightly as you go, and press to seal. You've made a letter fold.
Rotate the dough so it's oriented lengthwise in front of you, seam facing you. Starting at the top, roll the dough toward you, tucking and sealing as you go. Each roll should be tight enough to create tension but not so tight that the surface tears. When you reach the end, pinch the seam closed.
Optionally, gently taper the ends by rolling them under your palms to create a pointed batard shape.
Coat the top (seam side) with flour, then place the dough seam-side up into your banneton. The seam side is up in the banneton because you'll flip it over for baking -- the smooth side will be on top for scoring.
Building surface tension (the real skill)
Surface tension is everything in shaping. It's what makes your dough hold its shape instead of spreading into a puddle. It's what creates oven spring. And it's the single biggest difference between a pro-looking loaf and a home-baker blob.
Surface tension comes from stretching the outer gluten layer tight, like pulling a sheet over a mattress. Every drag of the dough across the counter, every fold tucked under, every roll during batard shaping -- all of these are tightening that outer skin.
The critical rule: don't use flour on the surface you're dragging against. Flour eliminates friction, and friction is how you build tension. You need the dough to grip the counter slightly as you pull it. Flour the top of the dough (the part your hands touch), never the work surface where you're building tension.
Another critical rule: use fast, confident movements. The slower you go, the more the dough sticks to your hands. Think quick tucks and pulls, not slow massage. Wet your hands with cold water if sticking is a problem -- water prevents sticking just as well as flour without killing the tension.
Common shaping mistakes
Using too much flour on the work surface. This is the most common mistake by a mile. You need friction to build tension. Flour eliminates friction. Only flour the top of the dough (so it doesn't stick to your hands), not the counter.
Shaping over-fermented dough. If your dough tears every time you try to tighten it, the gluten is mostly gone. No shaping technique can fix this. Your only option is a loaf pan. Next time, shorten bulk fermentation.
Shaping too aggressively. If you see the surface tearing, stop immediately. Let the dough rest 5-10 minutes. The gluten will relax and heal. Then try again with gentler movements. Every tear weakens the structure.
Not enough bench rest. If the dough keeps springing back and won't hold its shape, it needs more relaxation time. Wait another 5-10 minutes.
Touching the dough too much. Every extra touch is an opportunity for sticking and degassing. Set yourself a limit: 3-5 movements for pre-shaping, and one smooth sequence for final shaping. Practice being efficient.
Skipping pre-shaping for a single loaf. You can get away with it, but your final shape will be better if you pre-shape first. That initial rounding and bench rest sets up the final shape for success.